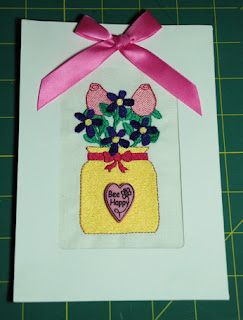
I love the look of home-crafted greeting cards. They're always fun to look at and each one is as unique as the person who created it. From the most simple to the very exotic and everything else in between, you're only limited by your imagine when it comes to making greeting cards and if you’re into scrapbooking, you may already have the supplies.
The supplies I used for this project were purchased from http://www.dickblick.com
- Grafix Double Tack Mounting Film – http://www.dickblick.com/products/grafix-double-tack-mounting-film/
- Strathmore Photo Frame Cards -http://www.dickblick.com/products/strathmore-photo-mount-and-photo-frame-cards/
The following may also come in handy:
· Mini Flat Iron (yes, the one for your hair, but if you don’t have one, a hair dryer or regular iron works too!)
· Ruler
· Rotary Scissors
· Pencil
· Glue, buttons, bows, etc. for embellishing.
· Last but not least, you’re going to need an embroidery design.
Now let’s get started!
Photo greeting cards are tri-fold with the window opening glued at each corner. Using a mini flat iron, grip each corner for just a couple of seconds to soften the glue dots. Flat irons are extremely hot, so use caution not to burn yourself or your card. If you don’t have a flat iron, a low heat set iron or a hair dryer work just as well.
Gently peel the photo opening away from the other side of the card. In the photo below, you’ll see the little purple glue dots. You don’t need to worry about removing them because they won’t be seen when you’re done.
Set your greeting card aside and proceed to your finished embroidery design.
Since the cards I’m using have a window opening of 3 1/8 x 4 5/8 inches, you’re going to need a design that will fit within those dimensions. For larger greeting cards, a photo mat and card stock cut to your liking works well also. As a digitizer, I have lots of test blocks ready to be put to good use. The floral design in the picture is part of The Country Needle’s Floral Bouquet set.
I measured and trimmed the design a ½ inch larger than the photo opening to allow for gluing.
Trim a piece of Double Tack Mounting Film 1 inch larger than your window opening. Peel off one side and press to the wrong side of your embroidery design. Make sure the design is smooth and there are no bubbles in the mounting film.
Lay your design on the opposite side of the window opening then close the window so that it sticks to the mounting film. Be sure your design is centered before applying pressure. I found it easier to center my design in my frame this way.
When your design is centered and is stuck to the window opening, peel off paper from the other side of the mounting film and using firm pressure, stick to the opposite side.
Your card is now complete and ready to embellish as you wish. Here I have added a bow and a button.
Here, I’ve used the February Calendar Girl Margaret. For the inside, I printed a quote and using a hole punch and ribbon attached it to the inside of the card.
Happy Stitching!


No comments:
Post a Comment